


Install RetroPie as operating system
Although RetroPie isn’t exactly an operating system, it is a stripped-down version of Raspberry Pi OS (previously known as Rasbian) that includes everything you need to enjoy old games. If we want to use the Raspberry Pi only as retroconsolethe first thing we must do is visit the official Retropie website and download the version that adapts to the model where we want to use it.
RetroPie is available for
- Raspberry Pi 1/Zero
- Raspberry Pi 2/3/Zero 2W
- Raspberry Pi 4/400
Next, we must unzip the file in .gz format to access the image that allows us to enjoy RetroPie as an operating system and that includes everything necessary to enjoy the roms of our favorite games.
To decompress this file, from Windows we can use Winrar. Once we have decompressed the file, we are going to use the Rufus application, an application that allows us convert an image to a bootable drive. We can download Rufus from its website or use any application that allows us to unzip an image to a memory card or USB.
In this case, we are going to use Rufus, for one of the best-known applications of this type and that offers the best results. First of all, we open the application with administrator permissions. We insert the microSD card into the device so that the application automatically recognizes it and selects it as the installation destination. This must be at least 8 GB. We must take into account that the card will be formatted to create a boot partition for RetroPie, so we are going to lose all the content stored inside it.
In Boot Choice, we select Disk or ISO image and then click Select to select the .img image that includes the version of RetroPie that we have downloaded and unzipped.
Finally, click on Start and wait for the process to finish. Once it has finished, we extract the SD card from the equipment and insert it into the Raspberry Pi. From this moment on, every time we use that memory card, the Raspberry can be used only as retroconsole. If we take into account the current price of memory cards, we can use different memory cards so as not to limit the operation of the Raspberry Pi to a retro console and expand its use as a multimedia center, a device for making backup copies, controlling the home automation and more.
If we don’t want to limit the use of the Raspberry Pi, we can install RetroPie only as an application on the Raspberry Pi OS. In this way, we will be able to expand the use of this small and versatile device for other purposes.
Use RetroPie as an application on a Raspberry
As I mentioned above, although RetroPie is not an operating system as such, it is an image that contains both the operating system (a very light version of Raspberry Pi OS) and all the necessary applications to enjoy it through emulators, which by the way are included, from old games, both from game consoles like PC. In addition, it includes support for controllers, which will allow us to enjoy these games just as we did in arcades and on consoles years ago.
To install RetroPie as a standalone application on a Raspberry Pi, the first thing we need to do is check if the Raspberry Pi OS has any pending updates, and if so, have it installed automatically using the command
sudo apt update && sudo apt upgrade
Next, we install the necessary packages to install RetroPie using the command
sudo apt install git lsb-release
cd git clone --depth=1 https://github.com/RetroPie/Retropie-Setup.git
To run the latest version of the RetroPie script we will type the following on separate command lines.
cd RetroPie-Setup chmod +x retropie_setup.sh sudo ./retropie_setup.sh
Next, a wizard will open where it will ask us what we want to do and where we are going to select BasicInstall. The basic installation installs the core and core packages which are the same as found in the RetroPie image that we can use to use the Raspberry Pi solely as a game console.
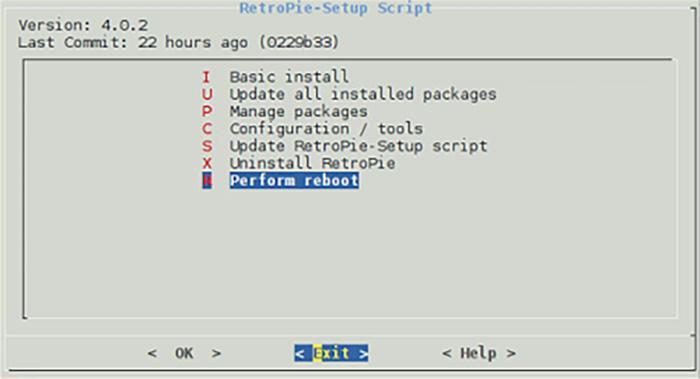
Once the installation is finished, we select the Perform reboot option to restart the Raspberry. Once restarted, it’s time to copy the roms with which we want to play. The main directory where they are stored is ~/RetroPie/roms. If it’s not in that location, it will be in /home/pi/RetroPie/roms.
In the roms directory, we find, in turn, other directories with the name of the systems that are emulated: snes, megadrive, nes and others. In each of these directories we must copy the roms that correspond to each console.
If we want to run roms from a drive connected via USB or transfer roms from a USB drive, we must first install usbromservice from the command line.
Once we have copied the roms in the directory corresponding to each one, we execute RetroPie with the command emulation station from terminal.
Are emulators legal?
Video game emulators are applications that, as their name suggests, emulate the operation of machines without using the original code, since otherwise they would be incurring a crime against intellectual property, so there is no legal problem when it comes to emulating the operation of an old-fashioned arcade machine or a console on a PC. Another thing is the ROMS.
The download of the ROMs are not legal, however, depending on the developer of the game, in many cases the blood does not reach the river, especially when it comes to video games so old that there is no way to get them legally. Also, many of the studios behind the video games closed their doors years ago without selling their games’ intellectual property to any company.