


When use apple devices or Apple services, these require a “own ID” for everything to work properly, since this identification is going to be used to access all the services that you have associated with the smartphone, such as iCloud, making purchases in the App Store, in Apple Pay and a long etc. It’s also important to know that it’s required to sign in to Messages and FaceTime, making it a must-have to communicate with friends, family, and co-workers through these iPhone apps.
On paper, a Apple ID is basically an email address and password. But these credentials are associated with more data, such as your phone number, date of birth and, if you wish, different payment methods and much more. What we achieve with this identification is to confirm our identity and assure the phone that it is we who are using it, as well as the rest of the services and platforms associated with it.
What can you do with the Apple ID?
The ID is the fundamental account that provides you with a digital identity to access Apple cloud services, in addition to many other things, not only on the iPhone, but on all the firm’s devices. These services are:
- Contacts Synchronization
- Calendar Synchronization
- Safari Bookmarks and History Sync
- iCloud backups
- Cloud Photo Storage
- download apps
- Payments through Apple Pay
- Access Apple Arcade games
- Download music and movies from the App Store
- Using AppleTV
- Download books from the Apple Store
- Purchasing products from the Apple Store
- Using iMessage
- Using FaceTime
- Use the Find Your iPhone service
- Using the tools to share content as a family
- Manage iPhone support
Account settings on iPhone
The truth is, if you’re setting up a new iPhone, this is the easiest step of all, since, when you buy a new terminal of the brand, during the initial settings you will be told to create or enter your Apple ID. If you don’t have one, you can generate one below by following the on-screen instructions.
However, since this step is optional, you can ignore it or do it later as follows.
Create an Apple ID
Although you can generate an ID from the computer, through the company’s page, we are going to do it faster from the iPhone itself. These are the steps to follow:
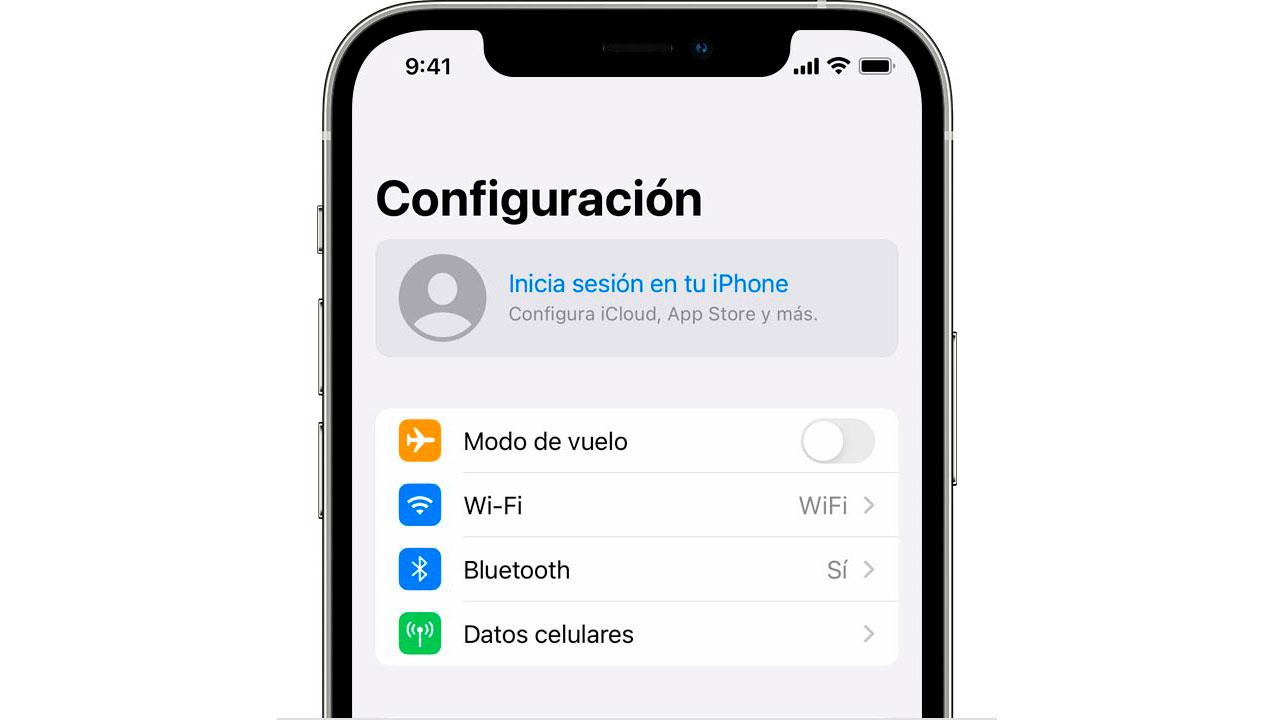
- Enter the Settings app on your iPhone
- Click on the text ‘Sign in to your iPhone’ that appears at the top of the screen
- Click ‘I don’t have an Apple ID’
- Click on the option ‘Create Apple ID‘
- You will be asked to fill in some information such as your date of birth, your first and last name, as well as an email address
- Next, you have to choose a password to access this Apple ID
- Choose three security questions and fill them with your personal answers that are easy to remember
- Accept the terms and conditions of the service
- Follow the instructions on the screen and choose the services you want to associate with the use of this identifier
Sign in on iPhone
As in the previous process we have created the username and password of our account, the process to log in to an iPhone when we already have a Generated Apple ID previously it is the same, but shorter.
- Enter the Settings app on your iPhone
- Click on the text ‘Sign in to your iPhone’ that appears at the top of the screen
- Enter your email and password
- Follow the instructions on the screen and choose the services you want to associate with the use of this identifier
Modify password
Change the password of our Apple account it is just as simple as doing it in any other online service in which we remember the access credentials. On the iPhone, do it like this:
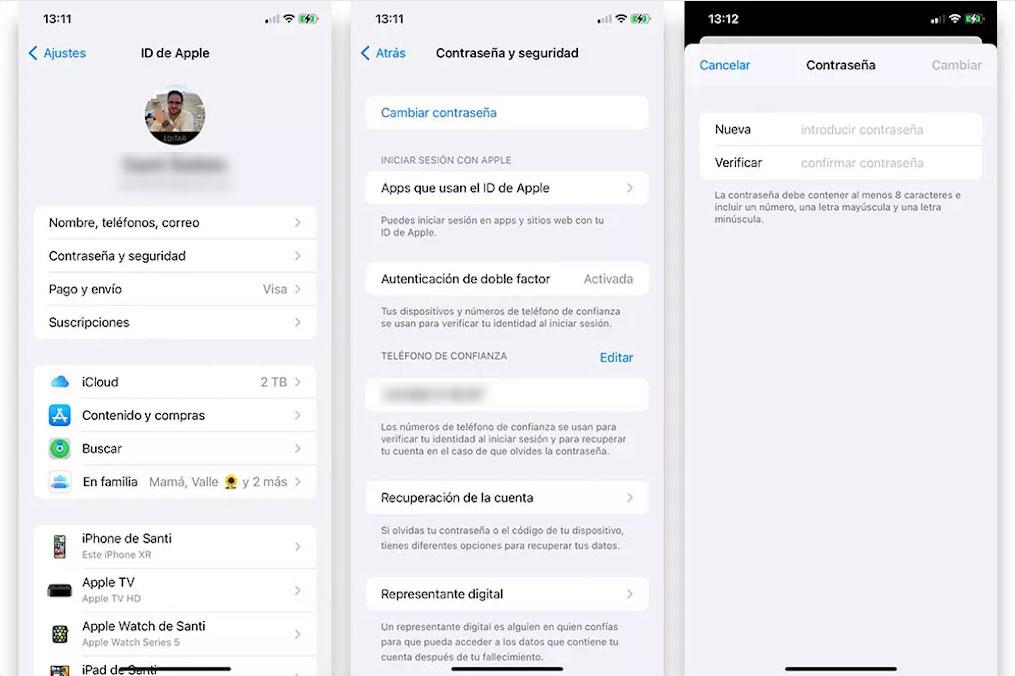
- Open the iOS Settings app
- At the top, click your Apple ID name
- On the next screen, click on Password and security
- click on Change Password
- Enter your fingerprint or pattern lock
- Enter your current password, then a new one and confirm the action
If what happens is that you don’t remember the service passwordnothing happens, you can open Safari and do the following:
- Go to apple.com website
- Enter your Apple ID username
- Enter the characters you see on the screen
- Here you can answer the three control questions that we previously set up when we created the Apple ID.
- Then you can reset the password
Once you reset the password of your Apple ID For security reasons, you should consider adding two-factor authentication. Two-factor authentication provides superior security over your password-only protection.
change the user
Of course, in any of the ways that we have indicated you can create all Apple IDs you want, as long as you do not repeat the same access email. Then, to switch between one and the other on your phone, you just have to sign out with one first, and sign in with another later.
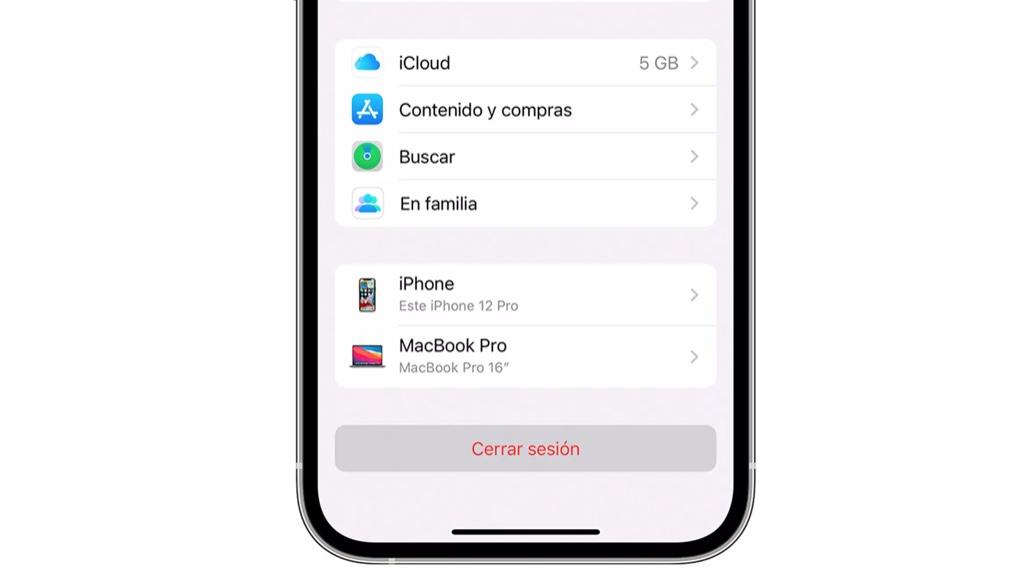
- Open the Settings app on your iPhone.
- Click on your ID at the top.
- Scroll down and tap the Sign Out option.
- You’ll be prompted to choose from the following three options: Sign out of iCloud and the App Store, Sign out of iCloud, or Sign out of the App Store
- Select which iCloud data you want to keep and which not
- Tap Sign Out once more
Next, you must log in with the other account as we said before:
- Go to the Settings app
- Tap the Start option at the top
- Enter the email and password of your other Apple user
Please note that while you can create as many IDs as you like, you can only create 3 different IDs in the same device.
Protect your ID on iPhone
As we have already said, this Apple ID contains a lot of personal information of the user, perhaps too much. If someone gets these credentials, they can access your private data like iCloud stored photos or password storage. For this reason, it will never hurt to add an extra layer of security to your account with the Apple two-step verification.
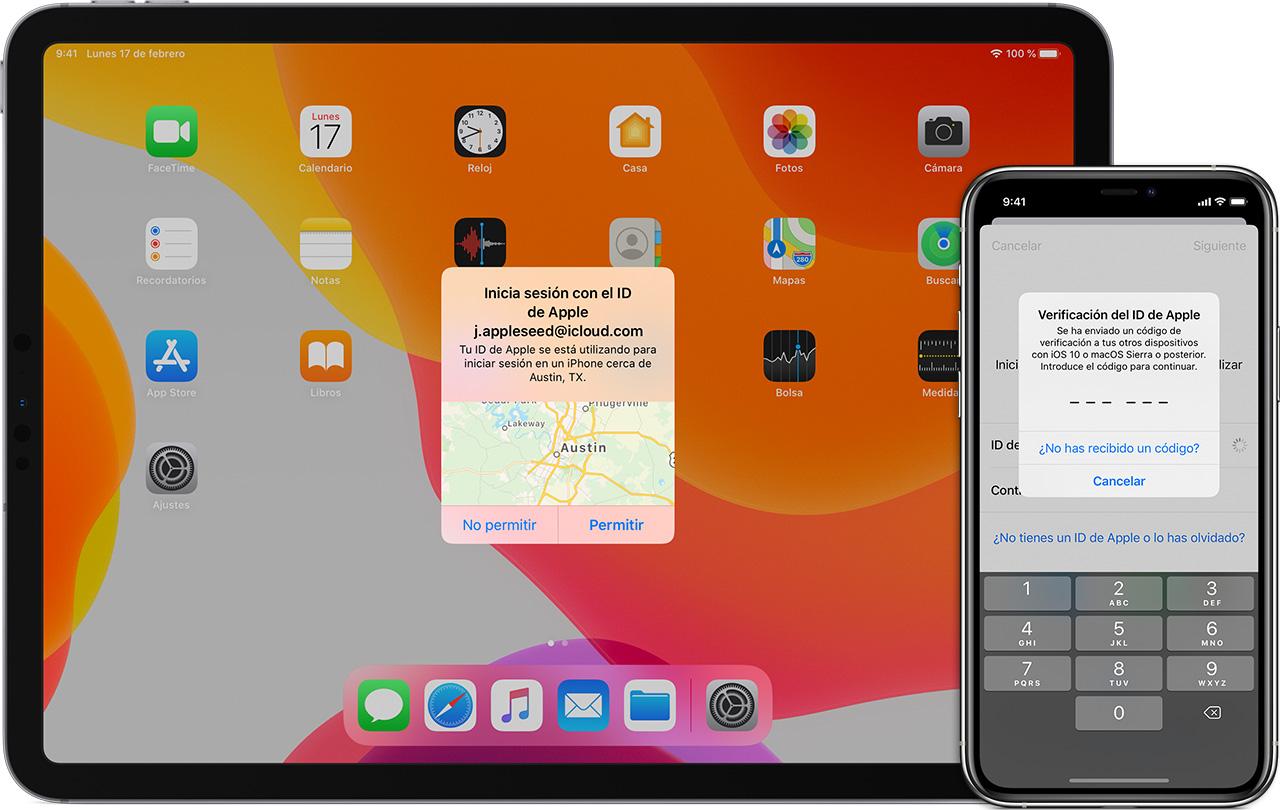
Through this system, one of the devices associated with the account or your phone number will be used to verify your identity before you are granted access to the Apple ID. It also includes a recovery key that allows you to access your account if you lose your password.
To set it up from your iPhone, do this:
- Open the Settings app
- Select your Apple ID at the top
- Click on the Password and security options.
- Select the option of ‘Activate two-factor authentication’.
- Now write the phone number where you want to receive verification codes when you log in, either via SMS or call.
- Tap Next.
- Enter the verification code to verify the phone number
- Finally, activate the security system