


Do you want to test your RAM memory, but don’t know how? Do not worry, because we will explain it to you below.
You may not know it, but all the components of your computer may fail at some point of its useful life. In some cases they can be recovered, but in others you will have to change them. And an example of this is RAM, which is one of those essential elements for the operation of the equipment and which is not without problems either.
Many times, these problems with this memory can be foreseen with a diagnosis. And the best way to do it is through a test that tests its performance and shows you an analysis. For this reason, we have prepared this post in which we will tell you all the ways to do this test.
Why do a RAM memory test on the PC
Find out why you should test your RAM from time to time, especially after experiencing some “symptoms”
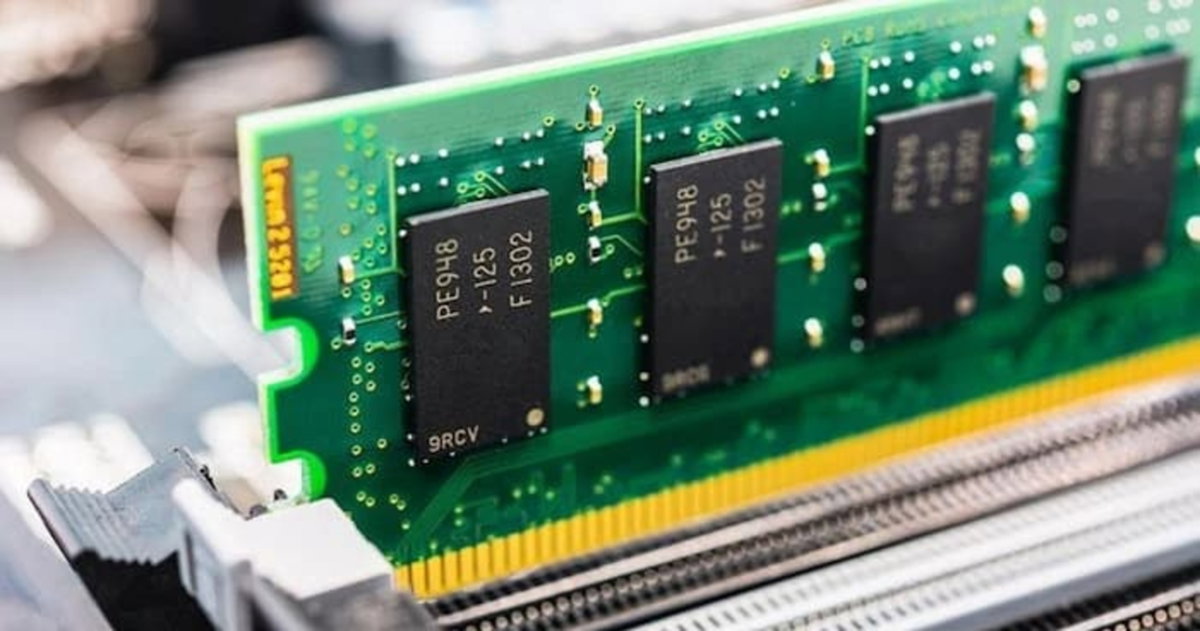
RAM It is an essential component for the operation of the computer.. In addition, it is necessary that you know how much quantity you need of it according to your needs. But choosing one also requires that you take the time to analyze the types of RAM that are out there and which one will fit your equipment.
As we have mentioned, RAM is a component that can fail, but these can be discovered before they get worse. For this, it is necessary to resort to a test with which you can know if it is correct.
periodically It may be a good idea to do a RAM test on your PC, since this way you can confirm that it does not present some type of failure that could endanger the stability of the system. And, as a curious fact, in general, this component usually shows symptoms that affect the user experience of the equipment.
Ways to do a RAM memory test on a Windows 11 PC
You should know that there are several ways to do a RAM memory test on your PC with Windows 11 and, in this way, you will be able to check that this component works as it should. In addition, these tests will analyze its performance and show you the results of the analysis so that you can make a decision.
In the next lines, we will tell you how to test ram memory with a tool that Windows comes with, but also with a third-party program.
With the Windows diagnostic tool
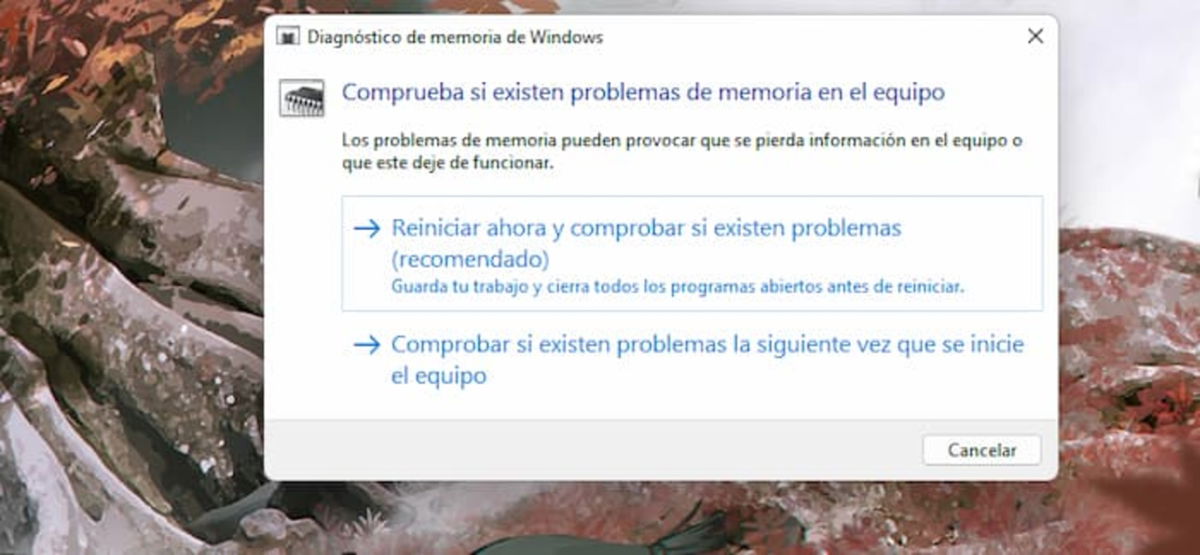
The Windows Diagnostic tool will allow you to test your RAM and detect problems
Windows, as an operating system, includes a lot of very useful tools with which you can diagnose problems with various components of your computer. One of these it also allows you to test your RAM to detect possible errors in its operation.
Best of all is that it is a reliable tool and that is included in the operating system. And if you want to use it, you must follow these steps.
- The first thing is to press the key combination Windows+R.
- In this search box, you must enter the term mdsched.exe.
- This will start the tool Windows memory diagnostic.
- In this interface, you will need to select the option Reboot now and check for problems.
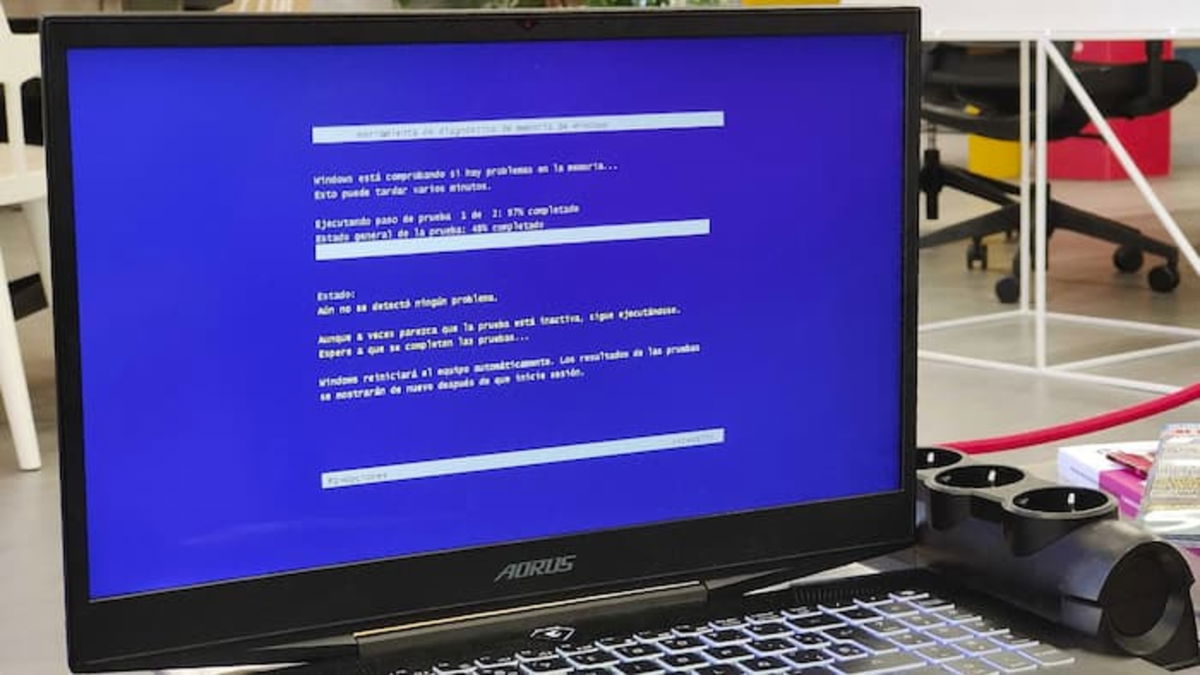
- After this, the device will restart and ask you to press the key F1.
- Then, you will have to select the type of test that you want to do to the RAM, be it basic, standard or extended.
- For a more thorough analysis, you should ideally select the extended test, although it will take more time.
- When finished, the operating system will restart again and will show you a notification with the results of the analysis.
With MemTest
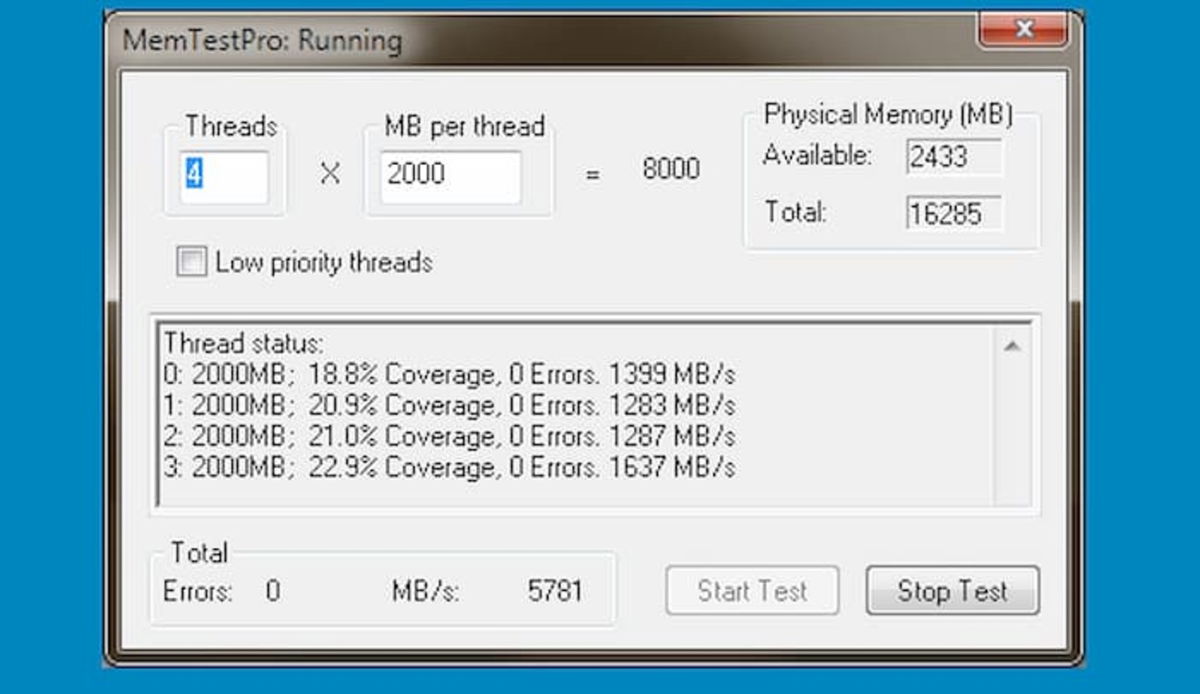
MemTest is a great tool to test your RAM and detect problems
If the previous method does not seem sufficient or reliable to you, then you should know that you have a third-party tool designed to test your RAM and detect problems. Plus, it’s free.
Although it is true that there are many programs for this purpose, this time we have chosen MemTest, which is available in two versions, one being free and one paid.
The free version of this program it will be enough to test your RAM and check its operation. You simply have to download and install the tool and follow the steps it shows you. In the end, it will also provide you with a result that you will have to analyze and make decisions.
Download MemTest
What to do if an error is detected after doing the RAM memory test
This is what you can do if the diagnostic of your RAM has detected a problem
One of the most tragic scenarios when having performed the RAM test is that, in the results, show you some error.
If the RAM is having a problem, the only thing you can do is exchange it for a new one. Although, before, you must make sure that this module is connected correctly. And remember that if you change this component, it must be compatible with your motherboard. Although, in case you have knowledge in this area, you can try to repair it on your own, either by adjusting the clocks.