


But not only to maintain anonymity is a VPN interesting, but we can also access our work network if we are at home, for example. What we do is create a tunnel between our device and the server. A private tunnel or channel that allows us the information to travel through it privately but also allows us to connect remotely to a server if you are at home with your laptop and want to work with the office network, for example.
Connect from programs
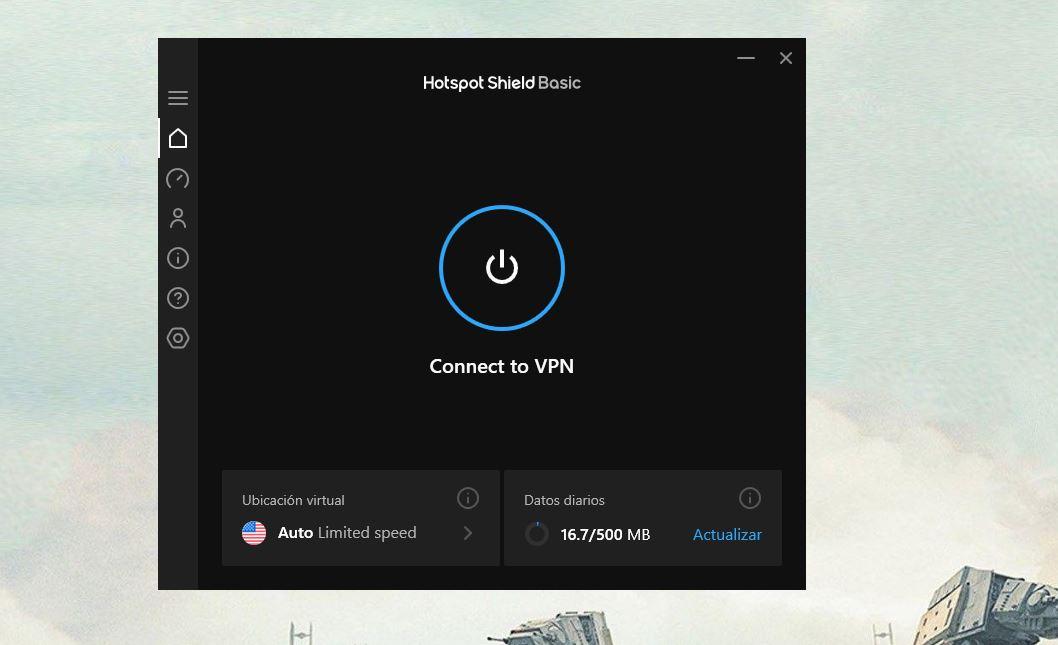
One of the options to connect to a VPN from any device is to do it from a program or a VPN that we buy or download for free. There are many available and we can download the software on our computer to activate it. Although it will vary depending on the program you install or download, practically all of them offer us a button on the interface where we can activate the VPN or disconnect it whenever we want. In addition, most of them will show us the country or region where the server to which we are connected is located and some offer some extra data such as maximum speed, daily data, etc.

Please note that these programs allow us to turn VPN on and off directly with a button on that device and in a matter of seconds, turning it on or off. We do not need to configure anything from the computer nor do we need to access the settings or anything like that. It will be enough to touch the button to make it work and the server from which we are connected begins to be active. Both from the computer and if we download the corresponding applications for the mobile phone, for the tablet or any device.
Connect to a VPN from the browser
There are other VPNs that are directly integrated from the browser and what they do is change the IP or hide us when we use that browser but not in the rest of the connections on the computer. Generally they work as an extension that we install in Google Chrome or other browsers and that offers us a series of available locations where there is a server from that company.
For example, we can use Zenmate which is a VPN for Chrome and the operation is identical to the previous programs if we want to activate or deactivate it: we open the extension and we have a button that allows us to turn it on or off. We just have to click on the switch and we will automatically connect. It will show us how long we have been connected and we can press the button again to disconnect immediately.

Add a VPN connection manually
As we have said in previous paragraphs, we do not always connect to a VPN from a program that helps us improve its privacy and security, but there are also other options such as connecting to the server or to the work network. In this case, we add the VPN connection manually on the computer.
From the Windows computer
Beyond the programs that allow us to turn the switch on or off, we can connect to the VPN by configuring the connection from Windows.
- We open the configuration on the Windows computer
- We look for the section or paragraph “Network and Internet”
- In the menu on the left, choose the “VPN” option
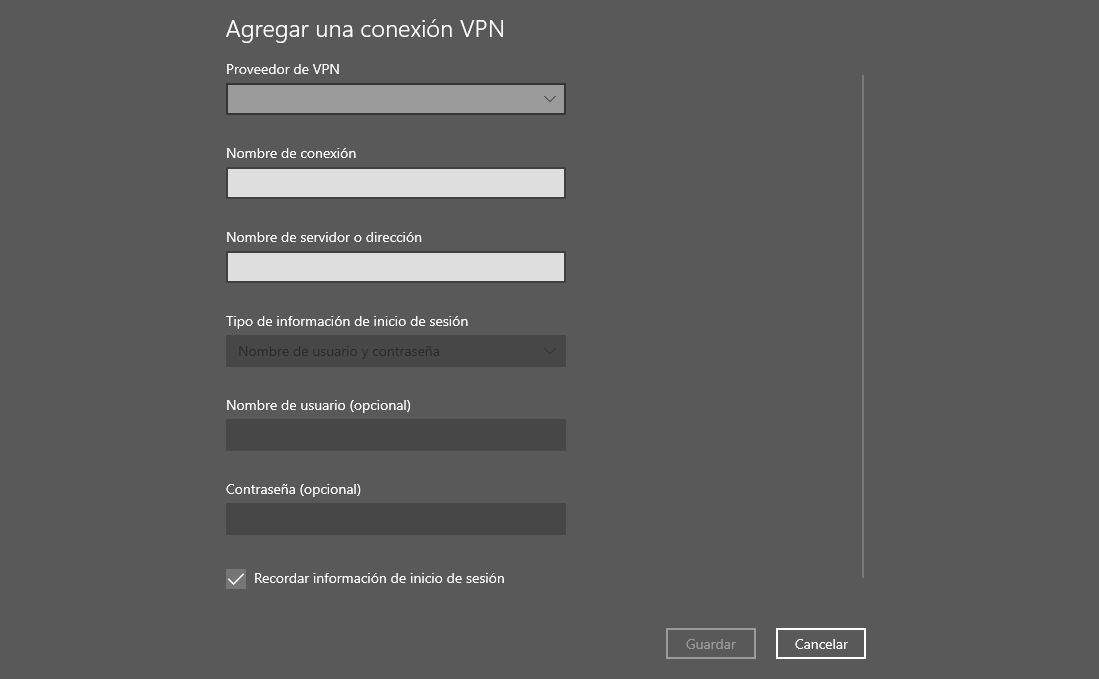
Once inside this section we can see an option at the top that indicates “add a VPN connection” along with a “+” sign. Tap on it and we will start to fill in the data to be able to connect the computer. We must fill in: VPN provider, connection name, server name or address, type of login information, username and password (optional) Once we have it, we confirm with “save” and we will have connected.
From a Mac computer
If you have a Mac computer, you can also manually configure the VPN on the Apple device. We will do it from the settings of the same…
- Go to the Apple menu with the apple logo
- Tap on “System Preferences”
- Click on “Network”
- tap on the button “Add+” from the list that we will see on the left
- Choose the dropdown menu “Interface”
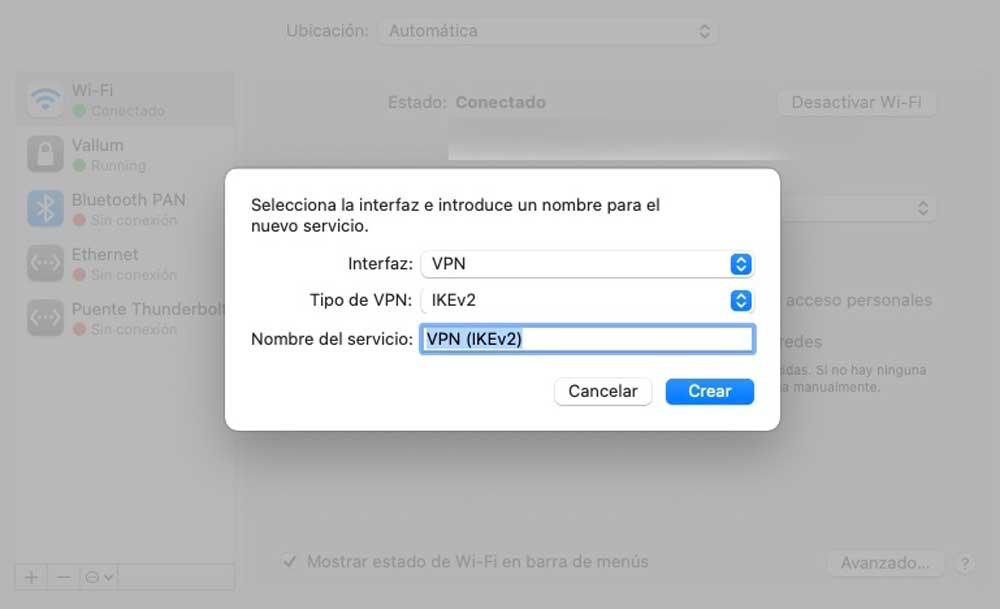
- Select “VPN”
Here we will have to choose the type of VPN from those available. In addition, we have to assign a name to the VPN service and we will have created it. We will have to fill in a series of data: enter the server address and the account name for the VPN connection.
When we have finished all the steps, we confirm with “OK”.
From an Android mobile phone
From the Android mobile phone we can also connect to a VPN from the settings. The steps are simple and will vary depending on the customization layer but they all allow us to configure a VPN regardless of the brand and model.
- We open the mobile phone settings
- Let’s go to the “Connection and sharing” section
- We scroll until we find the “VPN” section
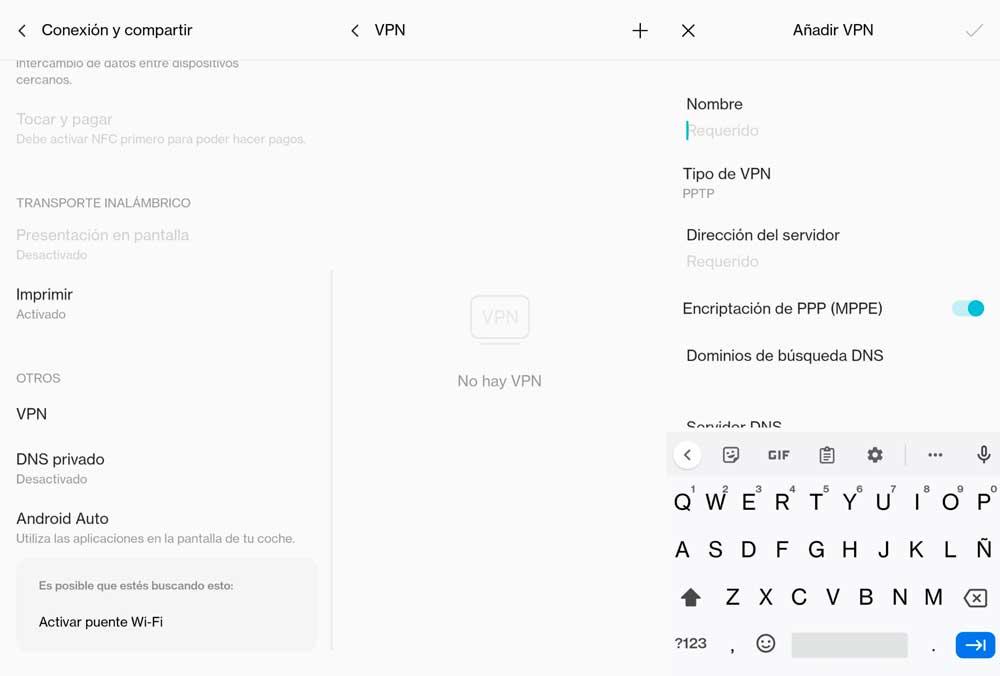
- We will see that it says “No VPN”
- Tap on the top right corner of the screen, on the “+”
- A series of data will appear that we must fill in
- Name
- VPN type
- Server address
- DNS search domains
- DNS server
- redirected route
- Once finished, confirm with the check in the upper right
You will have already configured the VPN on an Android mobile.
Set up VPN on an iPhone phone
If you have a phone of the brand of the apple you can also configure a VPN directly on the mobile beyond the programs that include a switch.
- We open the “General” section on the iPhone
- Let’s go to the “VPN” section
- We will enter the configuration of the same
- Tap on “Add VPN configuration…”
- Fill in all the data that will appear in the list
- Type
- Description
- Server
- remote ID
- site ID
- User authentication
- Username
- Password
- Proxy: No / manual / automatic
Once we have everything filled out, we confirm and we will have configured the VPN from our iPhone phone or from the tablet with iOS operating system. Although, as we say, we can also choose a compatible program or software (such as NordVPN or TunnelBear or CyberGhost) that allows us to access a switch to turn the VPN off or on.